 Name: BT-1
Date destroyed: c. 1 ABY, during the skirmish aboard Accresker Jail (rebuilt), 3 ABY on Tython (processor recovered), Between 3 ABY and 4 ABY, Amaxine Space Station (rebuilt)
Creator: Galactic Empire
Manufacturer: Tarkin Initiative
Model: BT-1 assassin droid
Class: Assassin droid
Height: Around 1.25 meters
Gender: Masculine programming
Sensor color: Orange
Plating color: Black
DEXTERITY 3D
Blaster 7D, Brawling Parry 4D, Dodge 6D, Flamethrower 5D, Grenade 6D, Melee Weapons 5D+2, Melee Parry 5D+2, Missile Weapons 6D, Projectile Weapons 5D, Throwing Weapons 4D+1
KNOWLEDGE 1D
Intimidation 6D, Languages 3D+1, Planetary Systems 3D+1, Streetwise 4D, Survival 4D+1
MECHANICAL 2D
Astrogation 5D, Space Transports 4D
PERCEPTION 1D
Hide 3D+2, Search 5D, Search: Tracking 6D+2, Sneak 4D+1
STRENGTH 3D
TECHNICAL 2D
Demolitions 4D+2, Droid Programming/Repair 4D+2, Security 4D+2
Equipped With:
Three wheeled legs (one retractable)
Retractable heavy grasper arm (lifting skill at 2D)
Retractable fine work grasper arm
Small buzz saw (4D damage, 0.3 metre range)
Video display screen
Holographic projector/recorder
Acoustic signaller
Blaster rifles - (Range: 4-40/120/300m Damage: 5D)
Flamethrower - (Range: 3-4/10/25, Damage: 5D first round, 3D each round for the next five, unless extinguished)
Missile launcher - (Range: 15-45/400/1.5 km, Blast Radius: 2-5/8/12, Damage: 6D)
Rocket booster - (Move: 25)
Ammunition production plant - Replenishes Ammunition Supply
Probe drone - (1D Attributes, Repulsorlift Move: 15, Search 3D)
Move: 5
Force Sensitive: N
Force Points: 3
Dark Side Points: 4
Character Points: 7
Description: BT-1, also referred to as "Bee Tee," was a homicidal BT-1 assassin droid created by the Galactic Empire's Tarkin Initiative. After being found and reactivated by Doctor Aphra, BT-1 and his fellow droid 0-0-0 served under Lord Vader, and when Aphra faked her own death, he and 0-0-0 continued to roam the galaxy with her.
Biography
Before activation
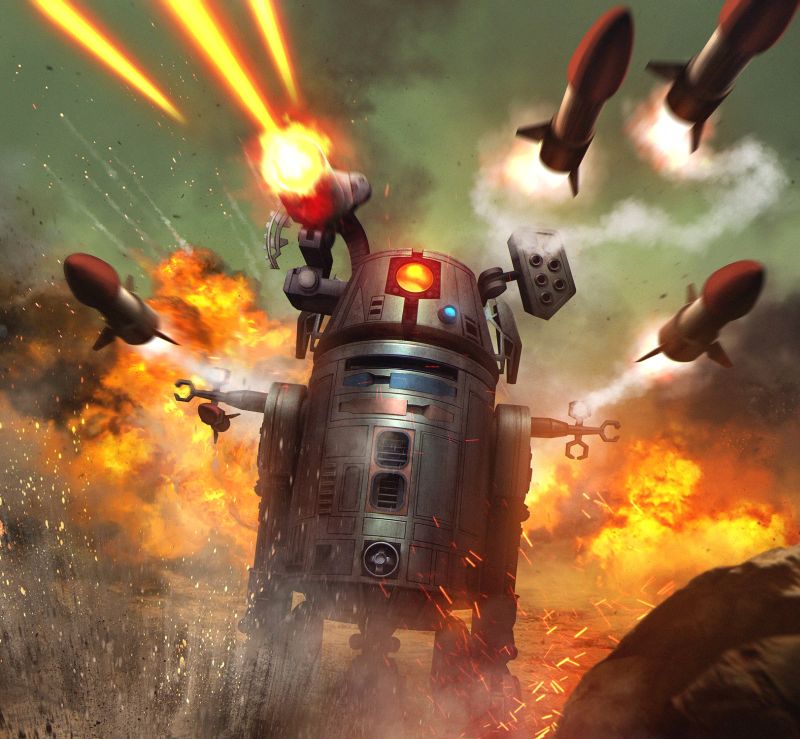
BT-1 was designed to look like an astromech droid in order to fool others, and was armed with a variety of weapons. He killed the staff of the Tarkin Initiative base in which he was created and then continued to set the base to self-destruct before jettisoning himself into space. He was found by the rogue archaeologist Doctor Aphra, who could not reactivate the assassin droid as she could not speak the R&D language the droid was programmed to understand. After Aphra reactivated the protocol droid 0-0-0, a droid capable of understanding the language, she had the protocol droid reactivate BT-1. Instead of giving the two droids to the Droid Gotra, as she had originally been hired to do, the archaeologist put them in the service of Sith Lord Darth Vader, who had tracked Aphra down to demand her services in creating a personal army for himself.
Serving Darth Vader
BT-1 accompanied Aphra and Vader, together with 0-0-0, for their mission on Geonosis, where Aphra had heard of a Geonosian queen who was in control of a droid factory. The four invaded the queen's factory, stole the machine that constructed droids and quickly escaped. Not much later, a bounty hunter that Darth Vader had earlier hired, Krrsantan arrived, with Cylo-IV, a person who Vader was suspicious of. Vader ordered 0-0-0 to interrogate Cylo-IV and when 0-0-0 believed that he had extracted all information he could, he killed him. 0-0-0 told Vader that Cylo-IV was training the Emperor's possible future replacements for Vader and the Dark Lord set course for Cylo-IV's research base.
To start off his attack, Vader sent BT-1 and 0-0-0 into the base as distractions. He then proceeded to attack Cylo-IV's men from behind, with his small army of droids. As he continued into the base, Vader found two twin humans, one male and one female. The twins attacked him, using lightsabers, however it was clear to Vader that they weren't Force-sensitive. After a quick fight, the two humans were told to stop by Cylo-IV, who revealed that he was an immortal system that switched to a new body as soon as the previous was destroyed and that his current body was called Cylo-V.
Cylo-V introduced his replacements for Vader and as Vader was about to strike Cylo down, the Emperor revealed himself to be in their presence and asked to see what Cylo's replacements were capable of. Cylo started by showing off the twins from before, named Aiolin and Morit Astarte. He continued to show the rest of his warriors, until he decided to show their abilities by having them all fight each other to the death. Vader started by fighting against an enhanced Trandoshan, but in the middle of their fight, Morit killed the Trandoshan. Sidious stopped the fighting, wanting to use them against his own enemies instead of each other. Vader left Cylo's research station and waited for Boba Fett, the bounty hunter he had hired to find the person responsible for destroying the Death Star. Fett told Vader that he had found the person and that the two briefly fought, with the latter winning. Fett had figured out that the person was named Luke Skywalker.
Vader's son
Sometime later, Vader instructed Aphra to join up with a group of bounty hunters and plunder an Imperial ship for credits. After sharing the credits between each other, the bounty hunters parted ways. Vader then sent Aphra to retrieve information on Commodex Tahn, the person who buried Padmé Amidala, as Vader wanted to confirm that Padmé gave birth to Vader's son before dying. Aphra, 0-0-0 and BT-1 went to The Ante an information broker, on the Spire, who after being paid a large amount of credits, gave the three information about Tahn, including the fact that he lived on Naboo. Thereafter, they attacked Tahn's home with some of Vader's droids and then subsequently tortured and interrogated Tahn, until he confirmed that Padmé had indeed given birth to a boy, after which 0-0-0 killed him.
Aphra, 0-0-0 and BT-1 soon returned to the Ante, seeking information on Luke Skywalker's location, while BT-1 and 0-0-0 went to play holochess. The Ante quickly figured out that Aphra was one of the plunderers of the Imperial ship carrying credits, after seeing the amount of credits she was ready to give, but still gave the location of Luke. The Spire was soon attacked by Imperials who believed that one of the plunderers were there. After quickly interrogating the Ante, the Imperials learned that Aphra was one of the plunderers from before. Aphra, BT-1 and 0-0-0 escaped the Spire, before finding themselves locked in by an Imperial blockade.
Darth Vader, who was on one of the blockade ship and could not reveal that he was working with Aphra, was able to convince Inspector Thanoth that they were wasting their time chasing a thief, when they could instead attack the recently discovered base of a Rebel Alliance squadron. With the blockade gone, Aphra met up with Vader again and told him that Luke was located on Vrogas Vas.
Before finding Luke, Vader took BT-1 and 0-0-0 with him to ore-rich planet of Shu-Torun, where both the ore-dukes and the ruling family were slowly rebelling against the Imperial control. While Vader was taken to a celebration party with Princess Trios, the two droids went to assassinate the king and his servants. When Vader and Trios found the dead bodies, Vader informed Trios that from now on, she would become the Queen of Shu-Torun and warned her that if the planet kept resisting the Empire, consequences would follow. Vader then sent BT-1 and 0-0-0 back to Aphra, while he set course for Vrogas Vas.
Vader kept contact with Aphra as he arrived above the planet, but not soon after arriving, he was attacked by Rebel Alliance ships. Aphra listened as Vader's ship crashed and decided to go and save Vader, with 0-0-0 and BT-1. After landing on the planet, they found Luke Skywalker and his astromech droid R2-D2. In order to trick Luke, Aphra painted 0-0-0 yellow and tricked Luke into believing that he was C-3PO, one of Luke's allies. 0-0-0 was able to get near Luke and shock him with electricity, making him fall unconscious. When he saw that he stood no chance against BT-1, R2 ran away, with BT-1 not far behind, following him.
Aphra and 0-0-0 were eventually found by Han Solo and Chewbacca who demanded they let Luke go. A fight between the four broke out, while Luke was still unconscious. R2 soon found Luke again, who was now conscious and the two outran BT-1. BT-1 then regrouped with 0-0-0, who had lost both his arms, one pulled off by Chewbacca, one by Luke and found that Aphra had fallen unconscious in the fight against Han.
The two droids got ready to eradicate Luke, Chewbacca, Han, and R2, but as BT-1 got his weapons ready, R2 sprayed oil on him, blinding BT and resulting in him shooting everywhere, giving time for the others to escape and trapping the two droids under rubble. As soon as Aphra woke up, she helped the droids out of the rubble and ordered the droids to find and secretly follow Luke. The two soon found C-3PO, whose arms 0-0-0 took, reattached on himself and left him.
Arrival of General Karbin
When 0-0-0 and BT found Luke, they saw that he was fighting Imperial troops and deduced that Vader was not near, as the Sith Lord was operating alone. They were then contacted by Aphra who told them that General Karbin, one of Cylo-V's replacements for Vader, had arrived on the planet to capture Luke for himself. Aphra told the droids to protect Luke from the Imperial troops in any way possible. Their protection wasn't enough, as Luke was captured by Karbin anyway.
Luke was taken aboard Karbin's ship, as Vader watched it fly away. Not wanting to accept Karbin's victory, Vader used the Force to crash the ship. Luke was found again by Han, Chewbacca, R2, and 3PO, before the group was approached by Aphra, who informed the group that they were standing on a minefield and threatened to kill them all if they didn't allow themselves to be captured. As they began dropping their weapons, Leia knocked Aphra unconscious from behind. The rebels took Aphra with them on their ship and left the planet.
Further trouble on Shu-Torun
After delivering Karbin's dead body to his master, Vader was ordered to accompany Cylo-V and his warriors for their return to Shu-Torun, after the resistance on the planet became too unbearable. After arriving on the planet, Vader met with bounty hunters Black Krrsantan, Zuckuss, IG-90, Dengar, Chanath Cha, Beebox, and C-21 Highsinger and told them to find and return Dr. Aphra to him.
Not much time went by before Beebox returned to Vader with a disintegrated body, claiming that he had killed her, however Vader quickly saw through Beebox's lie and killed him for it. While Vader was away, 0-0-0 and BT-1 gave some of Vader's droids the ability to leech blood, despite Vader's orders not to. The droids used this ability in their battle against Baron Rubix's soldiers, easily making their foes surrender out of fear. Vader soon learned of the two droids' actions, but had no time to care, as he had to use this chance to attack Rubix's citadel. After the execution of Rubix, Vader and his droids left it up to Queen Trios to defeat the now-weakened rebellion on the planet. Arriving back on a Star Destroyer, Vader explained to his two droids that before the attack on Rubix's citadel, Vader had been attacked by Cylo-V's two twin warriors, Aiolin and Morit, and that Morit had killed Aiolin in the fight. He also told the two that Cylo-V and the rest of his warriors had revealed themselves to be traitors, as they had aided the ore-dukes.
Traveling with Aphra
BT-1 was with 0-0-0 and Chelli Aphra when she met Hondo Ohnaka to arrange the theft and transport of the Sword of Khashyun. He traveled on Dok-Ondar's ship to the planet of Moraband. BT-1 infiltrated a Sith temple along with Chelli Aphra and two of Dok-Ondar's Shistavanen. Aphra ordered BT-1 to jam the transmission that Dok-Ondar was monitoring so she could double-cross him without him knowing it. As one of the Shistavanen guards removed the Sword from the throne where it was stored, BT-1 identified a whistling sound as an ultrasonic call for a Sith hound. This prompted Aphra to immediately order a retreat. As the hound gained on them, Aphra told BT-1 to disable the Shistavanen so the Sith hound would be distracted and they would be able to escape. Once outside the temple, BT-1 and Aphra were confronted by Dok-Ondar and his bodyguard. BT-1 was disabled by an ion blast from the Shistavanen bodyguard. He managed to reboot himself but couldn't prevent Dok-Ondar from fleeing with part of the sword.
Searching for the Ordu Aspectu
BT-1 accompanied Aphra and her crew to the Cosmatanic Steppes where she resumed her career as an archaeologist. He stayed on the Ark Angel II at Fulan Ro and bet 0-0-0 that Aphra would make it back to the ship alive. Upon her arrival, he gloated that 0-0-0 now owed him money. BeeTee watched as Soo-Tath threatened Aphra in an attempt to collect money she had borrowed from him. He and 0-0-0 followed Soo-Tath to a cantina where they killed him to prevent him from revealing Aphra's location to the Empire. BT-1 wanted to cremate the corpse, but 0-0-0 didn't want to raise suspicions about the cause of death.
BT-1 and the rest of Aphra's crew traveled to Archaeo-Prime to sell a valuable artifact and the droid was present when Aphra found out her doctorate had been suspended by her father. After returning to their ship, Korin explained his theory of the Ordu Aspectu, while BT-1 offered an alternative version of the story. The droid went to Yavin 4 with the Aphras to search for the location of the Citadel of Rur.
Once on Yavin 4, the group found their target, the Massassi Temple, surrounded by Imperial troops. When Black Krrsantan drew off most of the troops with a distraction, BT-1 and 0-0-0 infiltrated the temple. BT-1 wanted to do it aggressively with violence, but 0-0-0 convinced him that acting like normal droids would work much better. When they were inside, BT-1 opened the ventilation shafts so the Aphras could sneak in. After Korin and his daughter placed all the crystals, BT-1 noticed that several buildings in the Massassi Site were emitting bright beams of light. He brought this to the attention of the rest of the group.
After getting the necessary data to locate the Citadel, the crew started to flee the Temple. However, they ran into a group of stormtroopers. As the crew tried to find another way out, Chelli ordered BT-1 to slow down the stormtroopers. He did this by launching several explosives at them, killing them. When they were sighted by another group of Imperials, Chelli ordered the rest to run while she held them off. 0-0-0 complained he was too slow, so BT-1 extended some footrests and handles so that the protocol droid could ride him for a faster escape. The group managed to make it to a ledge on the outside of the Temple, but found themselves surrounded. Before they could be captured or executed, the Ark Angel II appeared, and BT-1 provided a smokescreen so they could safely board the ship and escape. Once they reached the Citadel, BT-1 disembarked with the rest of the crew to explore the structure. BT-1 and 0-0-0 were told by Chelli to return to the ship and get a crystal modulator so she could mimic the functions of the crystals used in the Citadel. On their way, the droids saw a group of snowtroopers, and hid in an alcove to avoid them. They boarded their ship and killed the Imperials that were guarding it. He left the Citadel along with Krrsantan and 0-0-0 when the Wookiee decided to abandon the Aphras.
Business Meeting
BT-1 was with Aphra when she convinced Luke Skywalker to go with her to the Citadel of Ktath'atn. During the trip, Skywalker stated that R2-D2 had defeated BT-1 in a fight, but BT-1 protested. 0-0-0 advised the Jedi to not anger the droid, as he might destroy the ship in a fit of rage. While approaching the building, 0-0-0 translated the name as "Screaming Citadel" and BT-1 expressed hope that it would live up to that name. He and 0-0-0 returned to the ship to wait for Aphra and Skywalker and later stopped Leia Organa, Han Solo, and Sana Starros as they came to rescue Skywalker.
When Aphra ordered 0-0-0 to come pick her up, BT-1 accompanied him on the Ark Angel II. He disembarked when Han Solo crashed the ship in a courtyard near Aphra. The group decided to flee to a secure location to get away from Queen of Ktath'atn's hive members who were chasing them. BT-1 unlocked a door that led them into a lab and then welded the door shut after everyone was inside. Aphra had the droid give her full access to the lab's terminal so she could get the schematics of the lab. After double-crossing the rebels, she told Sana and Leia to use BT-1 to blow out the back wall of the lab to escape from the Queen. Leia questioned if the droid had enough explosives to destroy the wall, and BT-1 enthusiastically deployed his missile launchers. After creating the escape route, BT-1 transported 0-0-0 to the ground by letting him ride him and using his booster rockets. Leia attacked Bombinax as a distraction, and BeeTee shot him with a large laser cannon so she could escape.
0-0-0 implanted an Abersyn symbiote in Krrsantan who used his enhanced strength to kill Bombinax. Afterwards, the Wookiee turned to Organa and Starros and 0-0-0 assured them that the enraged beast could kill them all, although BT-1 disagreed that he would be destroyed. After Krrsantan went to kill more of the hive, BT-1 went with the rest of the rebels to find Skywalker and Solo. As they were exploring the building, they came across Solo, who had been infected with a symbiote. Solo went to infect Organa, and the droids decided to abandon the rebels. Before they could go far, Starros stopped them and agreed to help them kill Aphra if they assisted in saving her friends. The droids assisted Krrsantan and BT-1 used his weaponry to destroy the hive members who were attacking the Wookiee. After Skywalker killed the Queen and Solo destroyed the hive, Aphra ordered BT-1 to burn the Citadel to the ground. The droid departed Ktath'atn along with 0-0-0, Krrsantan, and Aphra.
Setting up the auction
Needing to set up an anonymous auction to sell the activated Rur crystal, Aphra arranged an interview between Krrsantan and two journalists so she could secretly access their Undervine transmitter. Once they were distracted, BT-1 unlocked the journalist's starship although he stated he would have preferred to open a hole in the hull with explosives. He sliced into the Undervine so that 0-0-0 could compose the auction announcement.
Auction on Sorca
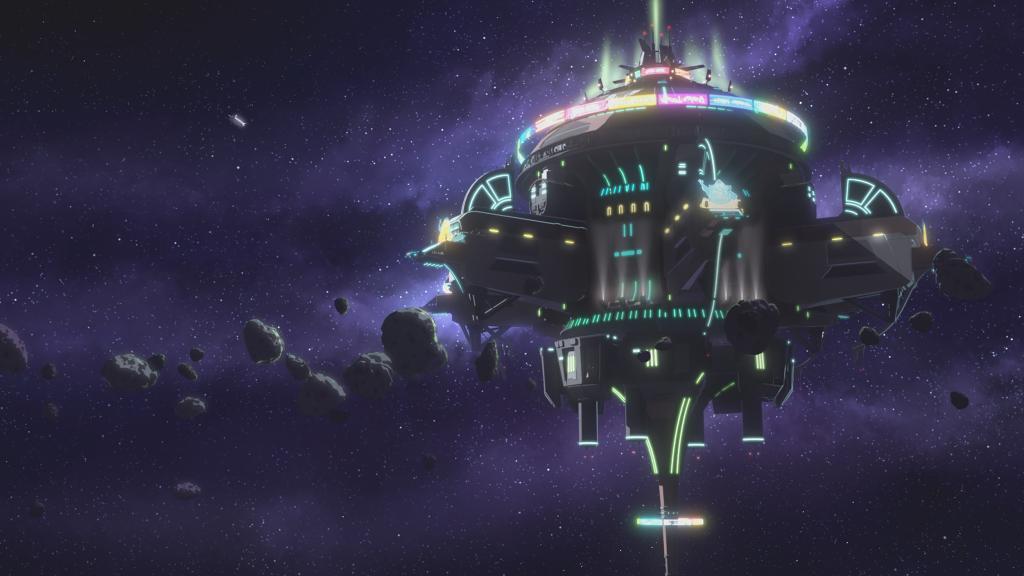
Before going to Sorca Retreat for the auction, Aphra's crew traveled to the Isolate-4 Lab to make sure she could control Eternal Rur's technopathy. BT-1 and 0-0-0 confirmed they were not under Rur's control after Aphra reactivated the crystal. The group proceeded to the space station and waited for all the auction participants to arrive. When all were present, BT-1 watched as Aphra gave an overview of crystal and its characteristics. BT-1 followed Aphra after she left so the bidders could discuss their plans. 0-0-0 stopped her and requested that she allow the two droids to perform some violent acts. They expressed their frustration with Aphra's plans. She ordered them not to kill anything without their master's orders. 0-0-0 saw a loophole in this order, and had BT-1 connect him to Darth Vader. The protocol droid realized that Aphra was very likely to betray and deactivate them when they were no longer useful to her. Concocting a plan, BT-1 told 0-0-0 that they should install the Rur crystal in a droid from the Cyban Front that was damaged in a demonstration of Eternal Rur's technopathy. While this was taking place, the two droids gave a private examination of the Rur artifact to Papa Toren and his benefactors the Xonti Brothers. When Black Krrsantan saw his nemeses, he went to attack them but was shocked unconscious by BT-1. The two droids took the stunned Wookiee to the medical center. BT-1 went with 0-0-0 to Aphra's quarters so he could observe the whole station. The droids activated the autoturrets and watched as Rur slaughtered the assembled group of auction attendees and waited for Aphra to arrive so they could give her their demands. When she arrived and realized that the droids had also led Darth Vader to the space station, they blackmailed her and forced her to remove the controls she had installed in them that compelled them to serve her and Vader. Freed, they left Aphra and went to find a way off the station. Yonak made his way to his ship and found it unguarded with dead stormtroopers all around it. BT-1 and 0-0-0 were on-board and suggested that they form a working relationship, although Yonak mistakenly thought he was in charge. Back on Son-tuul, 0-0-0 arranged raids so that rival gangs would come to Yonak's base for revenge. BT-1 eliminated them with his weapons.
Droids in charge
BT-1 and 0-0-0 led a large criminal syndicate on Son-Tuul that included Aphra, who was being blackmailed. The blastomech was present while 0-0-0 tortured a prisoner to death. He asked permission to play with the corpse. He also informed Aphra that if she stopped obeying orders, she wouldn't be useful to them and would be killed. BT-1 was present when Aphra reported into 0-0-0 about the results of the raid on Wat Tambor's workshop and used his holoprojector to connect the two. BT-1 was on Son-tuul when Aphra gave 0-0-0's lost memories to him. When Tolvan lead an Imperial attack on the Son-tuul Pride crime syndicate, BT-1 and 0-0-0 were able to escape in the confusion. 0-0-0 instructed BT-1 to access the datacard that Aphra had stored his memories on, but BT-1 informed him the card was encrypted.
Chasing Aphra
Later, BT-1 accompanied 0-0-0 to the Son-tuul Spaceport in his quest to find Aphra. BT-1 was with 0-0-0 when he hijacked a touring ship and overheard the intercepted message that Aphra had sent to Tam Posla. When they arrived at Accresker Jail, BT-1 was hung under the ship so he could fire his weapons. He shot down the shuttle that Aphra was escaping in and then proceeded to fire at Aphra and Magna Tolvan while 0-0-0 landed his ship. BeeTee stayed behind to guard their ship, but was destroyed by Darth Vader when he landed on the station.
BT-1's remains floated in the wreckage of Accresker Jail and were rebuilt by the corpse of Tam Posla. He was possessed by the Force energy that remained from a horde of Gundravian hookspores and used it to crudely re-assemble the droid. BT-1 was able to lead Polsa to Milvayne City where he located 0-0-0 by his transponder signature. The reanimated vigilante confronted Aphra and 0-0-0, and ordered BT-1 to eliminate them. 0-0-0 couldn't believe that BT-1 would turn against him, and the protocol droid had to be saved by Aphra when BT-1 opened fire with a flamethrower and other weaponry. The blastomech was disabled when Winloss and Nokk, who had been hired to capture 0-0-0, shot him with an ion-net. His carcass was used to lure 0-0-0 and Aphra into a trap as they tried to make their way across Milvayne City After Winloss and Nokk's starship was shot down by Coalition for Progress forces, Aphra managed to defeat the Imperials with a seismic pulse that was hidden in 0-0-0. He repaid the favor by showing her that Tolvan was safe and happy. Overjoyed, Aphra removed the datacard with his memories from BT-1's chassis and decrypted it for 0-0-0.
Upon learning that his creation was a mistake, 0-0-0 grew despondent and started to walk off. Aphra, realizing 0-0-0 intended to set off the proximity bombs embedded in them, quickly managed to re-active BT-1. While happy, 0-0-0 didn't trust that BT-1 wasn't under Aphra's control. BT-1 proved he was himself by shooting a blade into Aphra's leg. Still needing to get their bombs removed, 0-0-0 and Aphra rode on BT-1 before coming across Vulaada Klam and her pet qaberworm Gurtyl. Klam agreed to give the group a ride to the cyberdoc Prexo so they could have their bombs removed. When they got to the location, they were confronted by a group of stormtroopers. BT-1 was ordered to annihilate the Imperials. The droid proceeded to kill all the Imperials, and returned to 0-0-0 who was with Aphra. After realizing his implanted bomb was inert, 0-0-0 bid goodbye to Aphra and left with BT-1.
Back in the Empire's service
BT-1 was picked up along with 0-0-0 during an Imperial sweep on the Ring of Kafrene. He was memory wiped and assigned to the Executor to work as an interrogator droid. He was also fitted with a restraining bolt. Vader ordered BT-1 to prevent Chelli Aphra from interfering with the questioning of her father, who had been captured on Ash Moon 1. BT-1 accompanied Vader and the two Aphras to Asteroid Helix 13-v. He was ordered to watch the two archaeologists while Vader explored. Chelli discovered evidence that the rebels had been there and clues to their next destination. She tried to get BT-1 to give the information to Vader, but he forced her to do it herself. After finishing his exploration, Vader ordered BT-1 to contact the fleet and have them dispatch bombers to destroy the site. He also instructed BT-1 to travel back to the Executor on the Aphra's shuttle and kill one of the Aphras. During the trip, the shuttle was captured by Tolvan and Strike Team Misericorde. BT-1 was ordered to help repeal boarders but was stunned.
BT-1 was put into the brig. He was contacted by Chelli Aphra, who had been able to avoid capture. She ordered him to free her father, but the droid wanted to know how it would benefit him. Aphra told him he could kill everyone on the ship and the droid proceeded to help the prisoners to escape. He drug Korin back to the shuttle, and proceeded to escape from rebel custody on-board an escape pod with Chelli Aphra. He threatened to release poisonous gas to kill Chelli, but she realized he wanted to be free from Imperial service. She told him to contact 0-0-0 on the Executor and have him give a message to Darth Vader. BT-1 and Chelli flew to Tython and he entered the Martyrium of Frozen Tears. He assisted her in separating her from Darth Vader and the rest of the Imperial forces. BeeTee was commanded to knock over the Icon of Blessed Balance by Aphra so that the traps in the structure would eliminate the Imperials. BT-1 used his extensive weaponry to kill any snowtroopers that he encountered. Aphra trapped Vader in a solid kyberite confessional and told BT-1 to take out the Sith Lord's legs. The droid was then destroyed by Vader, who used the Force to tear him apart.
Chelli was able to disable Darth Vader and escape, taking the processor core of BT-1 with her. She stole a TIE/rp Reaper attack lander and had BT-1 encrypt and send a message to Hoth for her father, ward, and ex-lover.
Characteristics
BT-1 was originally programmed by the Tarkin Initiative to be violent and cruel. After being reprogrammed and having his behavior changed by Aphra, he was no longer rogue and was able to be commanded. He mostly accompanied 0-0-0 and possibly considered him a friend.
Equipment
BT-1 was equipped with rocket boosters, several blaster rifles, flamethrowers, and missile launchers. He was capable of auto-fabricating new ammo to keep his weapons supplied. He was equipped with a deployable drone that resembled a probe droid that he could use to perform reconnaissance and a circular saw he could use for melee attacks.
|

