 Name: Sayar Dun'La
Died: 138 ABY, Taivas
Species: Bothan
Gender: Male
Hair color: Black
Affiliation(s): New Jedi Order
Move: 10
DEXTERITY: 3D
Blaster: 4D+2
Brawling Parry: 5D
Dodge: 5D+2
Lightsaber: 6D+1
Melee Combat: 5D
Melee Parry: 4D+2
PERCEPTION: 3D
Bargain: 5D+1
Investigation: 4D
Persuasion: 5D+2
Search: 5D+1
Sneak: 4D+2
KNOWLEDGE: 3D
Cultures: 4D
Languages: 4D+2
Scholar (Jedi Lore): 7D
Streetwise: 5D
Survival: 5D+1
STRENGTH: 3D
Brawling: 5D+2
Climbing/Jumping: 5D
MECHANICAL: 3D
Astrogation: 4D+1
Repulsorlift Operation: 4D+2
Space Transports: 5D+1
Starfighter Piloting: 4D+1
TECHNICAL: 2D+2
First Aid: 6D+2
Medicine: 4D+2
Lightsaber Repair: 5D+2
SPECIAL ABILITIES
Wrendui: Bothans were covered in fur which shifted in response to their emotional state by way of gentle ripplings. It was this trait, named Wrendui, that betrayed them when members of their kind intended to be duplicitous in their dealings with others. Giving them a -1D to Con.
Ungulate: Bothans walk on cloven hooves, with the hock joint high up the leg. The legs are thickly furred down to the knee, and a long, hair tail grows from their posterior to almost to the ground. Bothans prance, and can run sure-footed in even dim light. Gaining a +2D to their Running Skill.
Force Skills
Control: 7D+2
Sense: 8D+2
Alter: 7D+1
Force Powers: Accelerate Anothers Healing, Accelerate Healing, Control Anothers Pain, Concentration, Control Pain, Danger Sense, Detoxify Poison, Enhance Attribute, Hibernation Trance, Reduce Injury, Remain Conscious, Return Another to Consciousness, Resist Stun, Transfer Force, Combat Sense, Life Detection, Life Sense, Magnify Senses, Receptive Telepathy, Sense Force, Telekinesis, Farseeing, Lightsaber Combat, Projective Telepathy, Affect Mind
EQUIPMENT
CREDITS - 1,000
Lightsaber (5D), Jedi robes, Comlink, Utility Belt
FORCE SENSITIVE - Y
FORCE POINTS 6
DARK SIDE POINTS 0
CHARACTER POINTS 8
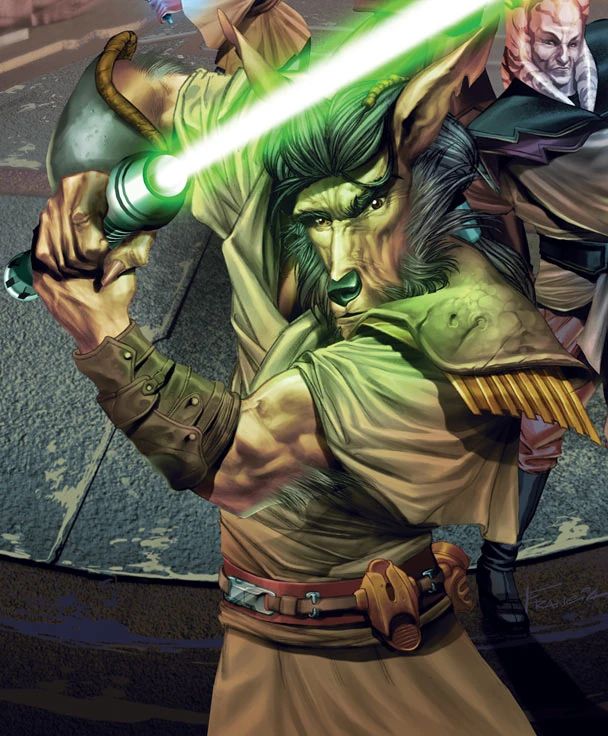
Description: Sayar Dun'La was a Bothan Jedi healer present at the Jedi Order's Hidden Temple when it was visited by the bounty hunter Cade Skywalker in 137 ABY during the Second Imperial Civil War. Skywalker sought to gain the Jedi Council's assistance in assassinating the Emperor and Dark Lord of the Sith Darth Krayt. The Council refused, however, choosing to pursue a potential alliance with the remnants of the Galactic Alliance and the forces of deposed Emperor Roan Fel. Dun'La, along with three other Jedi, was sent to meet with the leader of the Galactic Alliance Remnant, Admiral Gar Stazi. Yet during their discussions, a crewmember of Stazi's flagship, the Alliance, shot the Admiral, and the Alliance Fleet was attacked by Sith Imperial forces.
Rushing to aid Stazi, Dun'La took the Admiral to the ship's sick bay, where he treated him for his injuries while the Imperial fleet continued to pursue the Alliance forces through hyperspace. When Stazi woke, he refused to go into a bacta tank until he had spoken to his second-in-command, Captain Jhoram Bey. After Dun'La patched Stazi through to the bridge, the Admiral was able to provide Bey with the tactic needed to overcome the Sith Imperial fleet. Following the battle, Dun'La and the other Jedi were able to form a tentative pact with the Galactic Alliance Remnant.
In 138 ABY, Lord Krayt launched an attack on the Hidden Temple, and Dun'La was among the Jedi who fought the Sith Imperial ground forces. The Jedi planned to evacuate the planet, and Jedi Master T'ra Saa was gathering the energy of the planet to create a beam of light that could allow the evacuation ships to escape the enemy fleet. While defending Master Saa in the Jedi Council chambers, Dun'La was struck down by one of Darth Krayt's Sith troopers.
Biography
Forming an alliance
A Bothan Jedi healer, Sayar Dun'La was a Jedi Master in the New Jedi Order during the Second Imperial Civil War in 137 ABY. Dun'La was stationed at the Hidden Temple—where the Jedi had fled after the One Sith massacred members of the Order on Ossus seven years prior—around the time that the bounty hunter Cade Skywalker, descendant of Jedi Grand Master Luke Skywalker, came to the Temple in order to request the Jedi's aid in assassinating the Emperor and Dark Lord of the Sith Darth Krayt. Dun'La was present for Skywalker's arrival, as well as the arrival of a ship carrying Princess Marasiah Fel of the Empire-in-exile and a group of Imperial Knights. Skywalker and the Imperial Knights confronted each other and almost came to blows when Jedi Master Wolf Sazen, along with Dun'La and the Nikto Jedi Drok, intervened. The Jedi Council refused Skywalker's request and chose instead to pursue a potential alliance with the remnants of the Galactic Alliance and the forces of deposed Emperor Roan Fel.
After Skywalker apparently succeeded in his mission to kill Krayt, Dun'la—along with fellow Jedi Asaak Dan, Drok, and Te Corso—was sent by the Council to discuss the possibility of joining the Alliance and Empire-in-exile in the fight against the Sith. Traveling to the flagship of the Alliance Fleet, the Alliance, aboard their X-83 TwinTail starfighters, Dun'La and his fellow Jedi were greeted by the commander of the Alliance Remnant, Admiral Gar Stazi. Their conversation was interrupted, however, by Imperial Knight Sigel Dare—representing the Empire-in-exile—who wished to use one of the Alliance's shuttles to travel to the planet Dac to retrieve her former Master, Treis Sinde. Intrigued by Sinde's history, Asaak Dan offered to accompany Dare on her mission; and, after Stazi convinced the Imperial Knight to allow the Jedi to join her, the two left for Dac while Dun'La and the remaining Jedi were taken to discuss the Council's offer with the Admiral in private.
While Stazi and his second-in-command, Captain Jhoram Bey, discussed the Jedi's presence on the bridge of the Alliance, Te Corso sensed a disturbance in the Force just before the Alliance fleet was attacked by the Sith Imperial First Coruscant Task Force. Just as Stazi began ordering his fleet into action, however, he was shot by one of the ship's crew, the Mon Calamari Tealart, who was quickly disarmed by Drok. Rushing to the Admiral's side, Dun'La felt Stazi's life force flickering and quickly lifted his body with the Force to carry the Admiral to the sick bay. There, the Bothan was able to stabilize Stazi's condition, though his wound was serious.
While the Alliance Fleet fled from the Imperials through hyperspace, Dun'La and the ship's medic continued to treat Stazi. The Imperial fleet followed the Galactic Alliance, managing to track their coordinates and attack the Alliance shortly after the fleet left hyperspace. When the Admiral awoke, he refused to go into a bacta tank until he had spoken to Bey, so Dun'La patched him through to the bridge. Stazi told Bey to use their fleet's frequency vibrations to his advantage. With this knowledge, Bey was able to understand how the Imperials had managed to follow them through hyperspace by using the frequency vibrations from the Alliance's comm array like a beacon. Bey managed to outmaneuver the Sith Imperial commander by having only the Alliance waiting for the Imperial fleet when it left hyperspace for another attack, before the rest of the Galactic Alliance Fleet jumped into the area from behind to trap them.
Following the Alliance victory over the First Coruscant Task Force, Dun'La and the other Jedi were able to form a tentative pact with Stazi's command, and the Jedi Council agreed to meet with Emperor-in-exile Roan Fel on the planet Agamar to further discuss working together in the war.
Death
In 138 ABY, following the return of Lord Krayt, the Dark Lord of the Sith launched an attack on the Hidden Temple, having learned its location from a captured Imperial Knight. The Jedi were joined by members of the Alliance Remnant and Empire-in-exile in defending Taivas, and Dun'La was among the Jedi who battled the Sith Imperial ground forces. With the aid of Lord Krayt's Sith troopers, the Sith gained the upper hand in the battle. The Jedi had a plan, however; the Neti Jedi Master T'ra Saa was gathering the energy of the planet to create a beam of light that could allow the evacuation ships to escape the Sith Imperial fleet.
In the Jedi Council chambers, Dun'La—along with Cade Skywalker, Rawk, Drok, and Te Corso—battled the Sith troopers in order to protect Saa. Just as Master Saa gave the signal for the evacuation ships to take off, Dun'La was struck down by one of the Sith troopers. A damaged Annihilator-class starfighter set a collision course on the remains of the temple, and as it collided, Rawk helped Master Saa unleash the energy she had gathered. The beam of light annihilated any ships in its path, leaving an opening in the Sith Imperial fleet through which the Jedi and their allies were able to escape.
Personality and traits
Sayar Dun'La was a Bothan with black hair. A respected Jedi healer, Dun'La was trusted by the Jedi Council with being one of the four Jedi sent to discuss the possibility of joining the Galactic Alliance Remnant and Empire-in-exile in the fight against the Sith.
Powers and abilities
Sayar Dun'La was regarded as one of the Jedi Order's best Jedi healers. When Admiral Gar Stazi was shot on the bridge of the Alliance, Dun'La's fellow Jedi had complete faith in his abilities to look after the Admiral, and Dun'La was able to stabilize Stazi's condition. Aside from his healing abilities, Dun'La was also skilled with telekinesis, able to lift Stazi's body and carry him to the sickbay.
|


")

")
")